This is a so easy meal. All in one. I make it every year and this time I adapted it for the Foodi. So fast and easy. 30 minutes Ninja Foodi Meals
You will need:
1 tablespoon Avocado Oil
1- 1.5 lb of Pork loin, cut in half.
salt and fresh cracked pepper
1/4 cup thinly sliced red onion.
1 medium carrot, sliced in 1/2 inch rounds
1 pound small potatoes cut in half
1 1/4 cup of water
1 package of Maggi Seasoning Mix, German style Pork roast ( Schweinebraten)
Preheat the Ninja Foodi on Sear MD-HI for 4 minutes.
Salt and pepper pork loin roasts
Place oil in the pot, put loin roast in and sear for about 5 minutes, turning on all sides.
Add onion, carrots, potatoes to pot.
Mix the water with the seasoning mix package, pour over the meat and vegetables. bring to a boil, this will not take long.
Place the pressure cook lid on and set valve to seal, pressure cook on Hi for 3 minutes, Natural release for 5 minutes and then Quick release rest of steam. remove lid. check the meat it should be 140° on the meat thermometer. If not place back in pot and put lid on, it should continue to cook, recheck in about 2 minutes.
Remove meat and put in container with foil over it.
set the Ninja back on Sear and continue to cook vegetables for 4 minutes, while sauce thickens.
Slice meat
Place vegetables in serving dish
pour gravy over meat.
Thursday, February 28, 2019
Wednesday, February 27, 2019
Ninja Foodi: Auntie E's Apple Turnovers
The sweet tooth in the house is high. One thing I like to do is provide the sweets with a healthier choice. Granny smith apples are a good apple with lower sugar carbs than other apples. Fiber can be adding to help with the impact sugar glucose.
Regular red apples have:
Granny Smith apples have:
Protein.0.4g
With this recipe Brown Sugar is used instead of White Sugar. Brown sugar is a low glycemic index sugar. that means is does not give a spike in the blood sugar levels. With prediabetic and Diabetes people it is import to control the refine Sugars. Which cause Sugar spikes and crashes. Maintaining a good even level helps the body work at processing the sugar.
Using spices also help with the tartness of the Granny Smith Apples. I use a mixture of them to enhance and flavor.
Next thing is using a puff pastry instead of a Pie crust. There is less sugar in the puff pastry.
Puff pastry 3.5oz Pie crust 3.5oz
total Carb= 45.7 Total carbs= 64.48
sugar= 0.75g Sugar= 26.31 g
starch= 0 starch=37.67
We know the Starch is another thing to watch when eating for Diabetics. Starch the body converts to Sugar. Causing an increase in the Blood Glucose level. That is why Potatoes are not a good choice for folks with Diabetes.
Auntie E's Apple Turnovers.
4 Granny smith apples, peeled, core and sliced.
1 & 1/2 teaspoons of Cinnamon
1/4 teaspoon Nutmeg
pinch of ground Cloves
2 Tablespoon of Dark brown sugar.
1/2 cup water
1 teaspoon lemon juice.
combine all ingredients in the pot . Put the pressure cooking lid on , set to seal. Pressure on high for 4 minutes, Natural Release ( NR) for 5 minutes. Then Quick Release (QR). Remove lid. Pour apple mixture in a Strainer and reserve the juices. At this point you can refrigerate and use later.
When ready. take 2 sheets of Puff Pastry. Divide into 18 pieces. Put about 1 tablespoons of apple mixture on one side a one of the 18 pieces. fold over and crimp with fork. repeat with all 15 pieces.
spray the air crisp basket with some oil. (I use an Avocado Oil Spay). Preheat on bake at 375°F for 4 minutes. Open lid and place Turnovers in one layer ( it take a couple times to get all of them done.). You can do one batch( one puff sheet cut into 9 pieces) and save the second puff pastry to fixed later. Air Crisp at 375°F for 12 minutes. Remove and put in cooler rack. let rest about 10 minute before serving.
*You can make an icing from the liquid saved.
1/2 cup powdered sugar to about 2 tablespoons liquid. drizzle on top of cooled turnover. Note: that will add more sugar and calories to the turnover.
Recipe copyright 2019 by "Auntie E Cookbook/EM Dubros"
this is for non iced apple turnovers:

Regular red apples have:
| Total Carbohydrate 25 g | 8% |
| Dietary fiber 4.4 g | 17% |
| Sugar 19 g | |
| Protein 0.5 g |
Granny Smith apples have:
| Total Carbohydrate 14g | 5 % | |||
| Dietary Fiber 2.8g | 11 % | |||
| Sugar 9.6g |
With this recipe Brown Sugar is used instead of White Sugar. Brown sugar is a low glycemic index sugar. that means is does not give a spike in the blood sugar levels. With prediabetic and Diabetes people it is import to control the refine Sugars. Which cause Sugar spikes and crashes. Maintaining a good even level helps the body work at processing the sugar.
Using spices also help with the tartness of the Granny Smith Apples. I use a mixture of them to enhance and flavor.
Next thing is using a puff pastry instead of a Pie crust. There is less sugar in the puff pastry.
Puff pastry 3.5oz Pie crust 3.5oz
total Carb= 45.7 Total carbs= 64.48
sugar= 0.75g Sugar= 26.31 g
starch= 0 starch=37.67
We know the Starch is another thing to watch when eating for Diabetics. Starch the body converts to Sugar. Causing an increase in the Blood Glucose level. That is why Potatoes are not a good choice for folks with Diabetes.
Auntie E's Apple Turnovers.
4 Granny smith apples, peeled, core and sliced.
1 & 1/2 teaspoons of Cinnamon
1/4 teaspoon Nutmeg
pinch of ground Cloves
2 Tablespoon of Dark brown sugar.
1/2 cup water
1 teaspoon lemon juice.
combine all ingredients in the pot . Put the pressure cooking lid on , set to seal. Pressure on high for 4 minutes, Natural Release ( NR) for 5 minutes. Then Quick Release (QR). Remove lid. Pour apple mixture in a Strainer and reserve the juices. At this point you can refrigerate and use later.
When ready. take 2 sheets of Puff Pastry. Divide into 18 pieces. Put about 1 tablespoons of apple mixture on one side a one of the 18 pieces. fold over and crimp with fork. repeat with all 15 pieces.
spray the air crisp basket with some oil. (I use an Avocado Oil Spay). Preheat on bake at 375°F for 4 minutes. Open lid and place Turnovers in one layer ( it take a couple times to get all of them done.). You can do one batch( one puff sheet cut into 9 pieces) and save the second puff pastry to fixed later. Air Crisp at 375°F for 12 minutes. Remove and put in cooler rack. let rest about 10 minute before serving.
*You can make an icing from the liquid saved.
1/2 cup powdered sugar to about 2 tablespoons liquid. drizzle on top of cooled turnover. Note: that will add more sugar and calories to the turnover.
Recipe copyright 2019 by "Auntie E Cookbook/EM Dubros"
this is for non iced apple turnovers:
Monday, February 25, 2019
Grinding with Auntie E: Let's talk Gadgets

Today Let's talk prep. Do you prep items for easier cooking? One thing I have found that makes better choice in my time is the prepping. There are many tools to use. I have a few of my favorite.

One is a peeler. I have several. One that I reach for is these. They are Swissmar. I got them from William Simona. There are three, they have different peeling types. A Julienne peel, regular peel, and a wide thicker peel. These make it faster to julienne cut and peel. No more knife action. Use it for Soups, spaghetti sauce, pizza toppings and just sometimes hiding the veggies in the sauces. I really love these from William Simona because they have protective sleeves to keep the blades sharp. Most of the time they are hand wash in my house. Found Today's Dishwasher tend to dull the blades. Knife and cutter do not last as long. Have had these for over 10 years. Still as sharp as when I got them!
Another prep is when I get the grocery store vegetables home. I take them out of the bags and make sure they are dry. Wrap them in Paper towels and put them in the Vegetable Crisper. This keeps the veggie fresh longer.
Tell me what is your favorite kitchen prep tool?
Saturday, February 23, 2019
Ninja foodi: Banana Hazelnut Bread
 |
| Banana Hazelnut Bread |
I love Banana Bread. However the sugar content is high for Diabetic. I developed this version so we could enjoy some with my Dad. You could serve it with some ice cream for more carb in take. This recipe is half the carbs of Traditional Banana Bread .
3 Banana's Mashed
1/4 cup Dark Brown Sugar
1 1/2 cups Unbleached Flour
1/2 cup Hazelnut Flour
1 1/2 teaspoon baking powder
1 1/2 teaspoon backing soda
1/4 teaspoon salt
2 Large Eggs
1/2 Cup Melted unsalted Butter
2 teaspoon Vanilla Bean paste
1/4 cup chopped Hazelnuts
Cream bananas and brown sugar together , mixed well.
Add the eggs and Vanilla Bean Paste, beat well.
Combined the dry ingredients, except Chopped Hazelnuts, together and whisk to blend well.
Start with dry ingredients alternating with the melted butter, and ending with the dry mixture.
Add to creamed ingredients mix well after each addition.
Fold in Chopped Hazelnuts.
Pour into a 8 inch buttered and floured cake pan
Preheat the Ninja Foodi on Bake 325° F for 5 minutes,
put the cake pan on the rack, ( low position). lower into the inner pan.
Cook for 30 minutes on 325°F.
Lift out when done allow to cool for 10 minutes, remove from pan onto serving platter
Recipe copyright 2019 by "Auntie E Cookbook/EM Dubros"

Tuesday, February 19, 2019
Ninja Foodi; Carolina BBQ Chicken Wings
 |
| Carolina BBQ Chicken Wings |
I love Chicken wing and my favorite BBQ is Carolina. This recipe is a mixture of Pressure cooking and Air Frying.
3 lbs of fresh Chicken Wings
1 Tablespoon Chicken & Rib Rib Rub ( I used Galena Street from Penzeys spices)
1 cup water
1 Tablespoon of Liquid Smoke- Mesquite.
1/2 cup Carolina BBQ sauce
Mix Liquid smoke with water pour into cooking pot.
Place chicken in Crisper Pot and sprinkle both sides with Rub
Use pressure lid, set pressure knob to SEAL
PC on Hi for 10 minutes
QR, remove chicken from basket put in a bowl add BBQ sauce and toss.
Now I clean the basket and cooking pot at the point, while the chicken sits. You can refrigerate the chicken at this point and finish off later.
Put the cooking pot back in the NinjaFoodi and put the Crisper basket back in. Place chicken in Basket single layer and set AF for 15 minutes on 400°F
Check after 7 minute turn if your wish ( you really do not need to turn)
I put them in a bowl again and put 1/4 cup BBQ sauce on them and toss.
serves 4-6 people
These are so tender and fall of the bone good!
Recipe copyright 2019 by "Auntie E Cookbook/EM Dubros"

Wednesday, February 13, 2019
Ninja Foodi : The Perfect Rice
I have pressure cook my rice before and really did not like the out come. The rice turned out sticky and mush. I decided to return to the stove Rice. Recently I was reading some Foodi post on Cooking Rice in the Ninja Foodi. Almost all the folks decided to return to the stove for the rice. This got me thinking; Maybe I should look at it a different way. Let's Try Steaming the rice. Not washing or soaking first just putting the rice in and steam only. No Pressure Cooking. Which mean you do not set the Vent knob to Seal. Leave it in the Vent position.
1 cup Long grain Rice. I use jasmine. ( you do not have to wash the rice)
1 cup chicken Stock low salt. ( you can also use Beef or Vegetable broths or Water)
Put into Ninja Foodi pot, stir.
Use the Pressure cooker top, set pressure knob to Vent.
select steam function and set timer for 12 minutes.
The steam will build up and then escape through the black pressure knob. this is normal. it will slow down and the rice will still cook. Note: the red valve will not pop up with this method.
When the Done light comes on, remove the lid and stir rice. Perfect rice.
*I added cooked peas to the dish.
 |
| The Ninja Foodi Perfect Rice |
1 cup Long grain Rice. I use jasmine. ( you do not have to wash the rice)
1 cup chicken Stock low salt. ( you can also use Beef or Vegetable broths or Water)
Put into Ninja Foodi pot, stir.
Use the Pressure cooker top, set pressure knob to Vent.
select steam function and set timer for 12 minutes.
The steam will build up and then escape through the black pressure knob. this is normal. it will slow down and the rice will still cook. Note: the red valve will not pop up with this method.
When the Done light comes on, remove the lid and stir rice. Perfect rice.
*I added cooked peas to the dish.
Saturday, February 9, 2019
GADGET TIME: AVOCADO CREAM DRESSING
 |
| Avocado Cream Dressing |

ingredients:
1 ripe avocado
1/2cup Greek Yogurt
1/4 cup Avocado Oil
1 Tablespoon fresh lime juice
1 clove clove crushed
1/2 Jalapeno seeded and chopped
1/4 teaspoon sea salt
Put all the ingredients in the Bowl.Set top on and Lock in place. Put lever to puree. Press the top pulse/on , it is on the handle with a finger indent. Pulse it until it is blended creamy.
Recipe copyright 2019 by "Auntie E Cookbook/EM Dubros"

Friday, February 8, 2019
Ninja Foodi: NewYork Almond Cheesecake
 |
| NewYork Almond CheeseCake |
I have a favorite Cheesecake. Learn how to cook it in Germany many years ago. Sometime ago I made it healthier for my family. Decided to try cooking it in the Ninja Foodi. It had to be adapted to the Foodi due to the size of it. Also I do not use Graham Crackers for the crust, therefore I have to first use the Bake/ Roast and then Change to Pressure cooking after that I put the topping on and use the Bake/roast to brown the top. I know this sound complicated but is really is not. The Cooking time in a regular oven is about 60 minutes. The Ninja Time is about 30 minutes total. Half the time.
All Ingredients should be at Room Temp. This allows for even cooking.
For the Crust:
3 Tablespoon Unsalted Butter (room temp)
2 Tablespoon Fine Grain Sugar
1 Large Egg ( room temp)
1/4 cup Almond Flour
1/2 cup Flour
3/4 teaspoon Baking Powder.
Add all the ingredients above in a mixer and Mix on medium ( #4 on the Kitchen Aid mixer).
til Blended well.
put it on the bottom of the spring form pan and spread up the sides about 2/3 of the way up, making sure the bottom of the pan remains covered. I use the back of the small spoon.
set aside.
Now make the filling:
16oz Cream cheese, (room temp)
1/2 cup sugar
3 Room Temp Large Eggs
1 Tablespoon All purpose Flour
1 Tablespoon Almond Flour
1/2 teaspoon vanilla Extract
1/4 teaspoon almond Extract.
Cream cheese and Sugar together . Add one egg at a time and blend well after each addition. Add flours and Extracts and blend well.
Pour In to the spring form pan. smooth out evenly.
Put on rack in the Ninja foodi and close lid set on Bake/roast on 375°F for 5 minutes.
after done, add 1 cup of water, Pouring so it goes in the bottom of the liner pan.
put the Pressure cooker lid on, set the vent knob to Seal. turn on pressure setting and set for 15 minutes.
when done Quick Release Steam. open and remove lid. Leave cheesecake in the unit.
Prepare the topping below.
Topping:
1/2 Cup sour cream
1 Tablespoon sugar
1/4 teaspoon Vanilla Extract.
mix together by hand is fine.
Pour over the Cheesecake and spread out to edges.
close Air Crisp top and set on Bake/roast 400°F for 5 minutes.
When done remove from Ninja foodi pot and set on counter for 20 minutes, then put in refrigerator to cool. At least 2 hours.
Top with Berries and serve.
Recipe copyright 2019 by "Auntie E Cookbook/EM Dubros"

Thursday, February 7, 2019
Ninja Foodi:: Savory Italian Chicken
 |
| Savory Italian Chicken |
I adapted one of my Mothers Pressure Cooker recipe from the 1960's. She use to make it on the stove with a traditional pressure cooker. She made it with a Chuck Roast. I adapted it for chicken. My Hubby can not eat red meat due to a disease.
I buy the chicken from Costco, it is already beboned and skinned. Easy to use. Also used it fresh and not frozen for this recipe.
You will need:
4 pounds of Fresh Chicken Legs and Thighs, Deboned and Skinned
1 -8oz can tomatoes sauce
1 cup Chicken Bone Broth
1 Can( 3oz) of Mushrooms( undrained)
1 Tablespoon Dried Chopped Onion.
1/2 Tablespoon Italian seasoning ( used McCormick Perfect Pinch Italian)
1/2 Cup Dry Red Wine
3 Cloves of Garlic, minced (used a garlic press)
1 teaspoon salt and pepper mix
1 Carrot thinly sliced-about 1/2 cup.
Put all ingredients in the Ninja Foodi main nonstick pot (for pressure cooking), Stir well.
Put Pressure Cooker Lid on Set on Pressure, HI for 20minutes, Quick release.
Remove chicken set aside.
Make Slurry:
1/4 cup Cornstarch and 1/2 cup cold water, stir together until all the cornstarch is dissolved. this is called a Slurry.
Add this to the liquid in the Ninja. turn on the Saute and cook until thick and bubbly.
pour some sauce over chicken on platter and serve with rest in a gravy boat.
. Refrigerate left overs.
serves 6-8 people.
Recipe copyright 2019 by "Auntie E Cookbook/EM Dubros"
Monday, February 4, 2019
Kitchen Gadgets: Ninja Foodi

Moving to the Pressure cooking choices. I have used the Pressure option. Made pasta dishes as well as Pulled pork. Love it! the Mac and Cheese comes out better in the Ninja Foodi than in the Instantpot. Plus I love being able to add the breading topping and broiling it. like it came out of the oven crisp. The Steam choice is an additional delight. I have used it to steam veggies and eggs. Haven't used the slow cooking feature yet. Looking forward to seeing how that works. The last choice is the Sear/Saute button. Used that one yesterday for the pulled pork. Found that the heat was much more easy to control than the Instantpot. The Meat browned but didn't burn. When I use the InstantPot I didn't use the Saute cause it was either to hot or not hot enough. So I did all my searing on the Stove top. Loved that I can use the Ninjafoodi for it now.
I Prefer the Ninja Foodi over the InstantPot. Having said that, There are things that the InstantPot does that the Ninja Foodi can not; Sterilize items, Canning and make Yogurt.
This is my review of the Ninja Foodi, based on my experience. I was not paid are have a received any free merchandise from the Ninja company.
Saturday, February 2, 2019
Ninja Foodi Pot : Casarecce Italian Bake
I received a Ninja Foodi for the holiday this year. I have been testing recipes in it. Love using the Air Crisper,Bake/ Roast, Broil, Steamer and Pressure. Today I used the Sear/Saute in combination with the Pressure function. I love it, so much better than my InstaPot. I felt that the saute heat was more controllable. It didn't burn on the button. this recipe came out better in the Ninja Foodi. So I decided to post it. I use Casarecce Noodles*. They are very good for this type of recipe cause the sauce get into them. This recipe takes about 30 minutes from Start to Table.
This is the recipe for the Italian bake, cooked in the Ninja Foodi.
1/2 lb ground Italian sausage
2 Tablespoons Minced Onion
2 cloves garlic minced.
1 can 14oz Diced tomatoes(undrained)
2 teaspoons of Italian seasoning
8oz ( 2 cups) of Casarecce pasta
2 cups Low sodium Chicken Stock
Salt and Black Pepper
Turn Ninja Foodi on and press the Saute button and start. Preheat for about 2 minutes, Add sausage and cook breaking up into small pieces for about 3 minutes, stirring during that time off and on.
Add onion, 1 teaspoon of the Italian seasoning and garlic continue to cook for 3 minutes,
Add can of diced tomatoes, 1 teaspoon of the Italian seasoning( the rest of it) and pasta, stir well cook for 1 minute.
Add Chicken Stock and stir. Place Pressure Cooker Top on and make sure the Pressure Release Valve is set to Seal. Press the Pressure cook button and set on HI for 6 minutes.
Natural release for 4 minutes.
Then Quick release by setting the pressure release Valve to the Vent Setting. Once the Red Float Valve ( the pressure is released completely) is down remove lid. salt and pepper to taste, Stir and serve.
Recipe copyright 2019 by "Auntie E Cookbook/EM Dubros"
* I used Garofalo Pastas
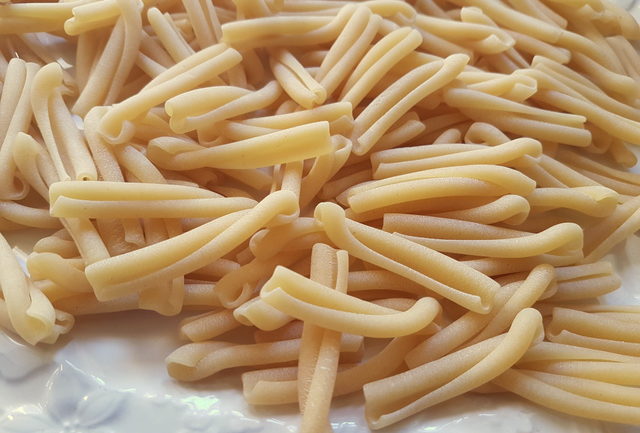 |
| Casarecce Noodles |
1/2 lb ground Italian sausage
2 Tablespoons Minced Onion
2 cloves garlic minced.
1 can 14oz Diced tomatoes(undrained)
2 teaspoons of Italian seasoning
8oz ( 2 cups) of Casarecce pasta
2 cups Low sodium Chicken Stock
Salt and Black Pepper
Turn Ninja Foodi on and press the Saute button and start. Preheat for about 2 minutes, Add sausage and cook breaking up into small pieces for about 3 minutes, stirring during that time off and on.
Add onion, 1 teaspoon of the Italian seasoning and garlic continue to cook for 3 minutes,
Add can of diced tomatoes, 1 teaspoon of the Italian seasoning( the rest of it) and pasta, stir well cook for 1 minute.
Add Chicken Stock and stir. Place Pressure Cooker Top on and make sure the Pressure Release Valve is set to Seal. Press the Pressure cook button and set on HI for 6 minutes.
Natural release for 4 minutes.
Then Quick release by setting the pressure release Valve to the Vent Setting. Once the Red Float Valve ( the pressure is released completely) is down remove lid. salt and pepper to taste, Stir and serve.
Recipe copyright 2019 by "Auntie E Cookbook/EM Dubros"
* I used Garofalo Pastas
Subscribe to:
Posts (Atom)